预制体模块
一、概述
在项目开发中,经常会出现这样的情况:
(1)立项的时候,美术定义一系列标准的字体颜色、字号,在各个UI中应用,有一天美术突然说要更改默认的字体颜色、字号,UI制作者就需要把所有界面都修改一次,这样会非常麻烦。针对这种情况,使用预制体就能轻松应付,只修改一个地方,就能影响全局。
(2)不同的2D界面,局部有相同的布局,希望修改一次,多个界面相同布局跟着一起变化。针对这种情况,使用预制体就能轻松应对。
(3)3D项目开发中,重复使用在同一场景中或者不同场景中的某种对象,例如模型、贴图、动画等设置都制作好了,就可以在场景中直接创建英雄、怪物、特效等。我们希望在使用的时候只需用代码加载即可。针对这种情况,使用预制体才能实现。
针对类似上面需求,LayaAirIDE提供了2D预制体和3D预制体,接下来本文将介绍这两种预设如何使用。
二、IDE中创建
创建预制体的过程只能在IDE中完成,通常预制体创建后都是以“.lh”为后缀的文件。本节介绍在IDE中如何创建预制体(2D)和预制体(3D)
2.1 创建预制体(2D)
预制体(2D)是针对2D界面开发过程中所使用的预制体,通常对于重复会用到的2D组件、局部界面等。
如动图2-1所示,在IDE中项目资源的assets下,开发者可以选择希望预制体存放的目录,在此目录下,鼠标右键的菜单中创建预制体(2D)
(动图2-1)
创建好的预制体,通常开发者是需要重新命名的,这样才能通过名字来识别预制体的功能,如动图2-2所示
(动图2-2)
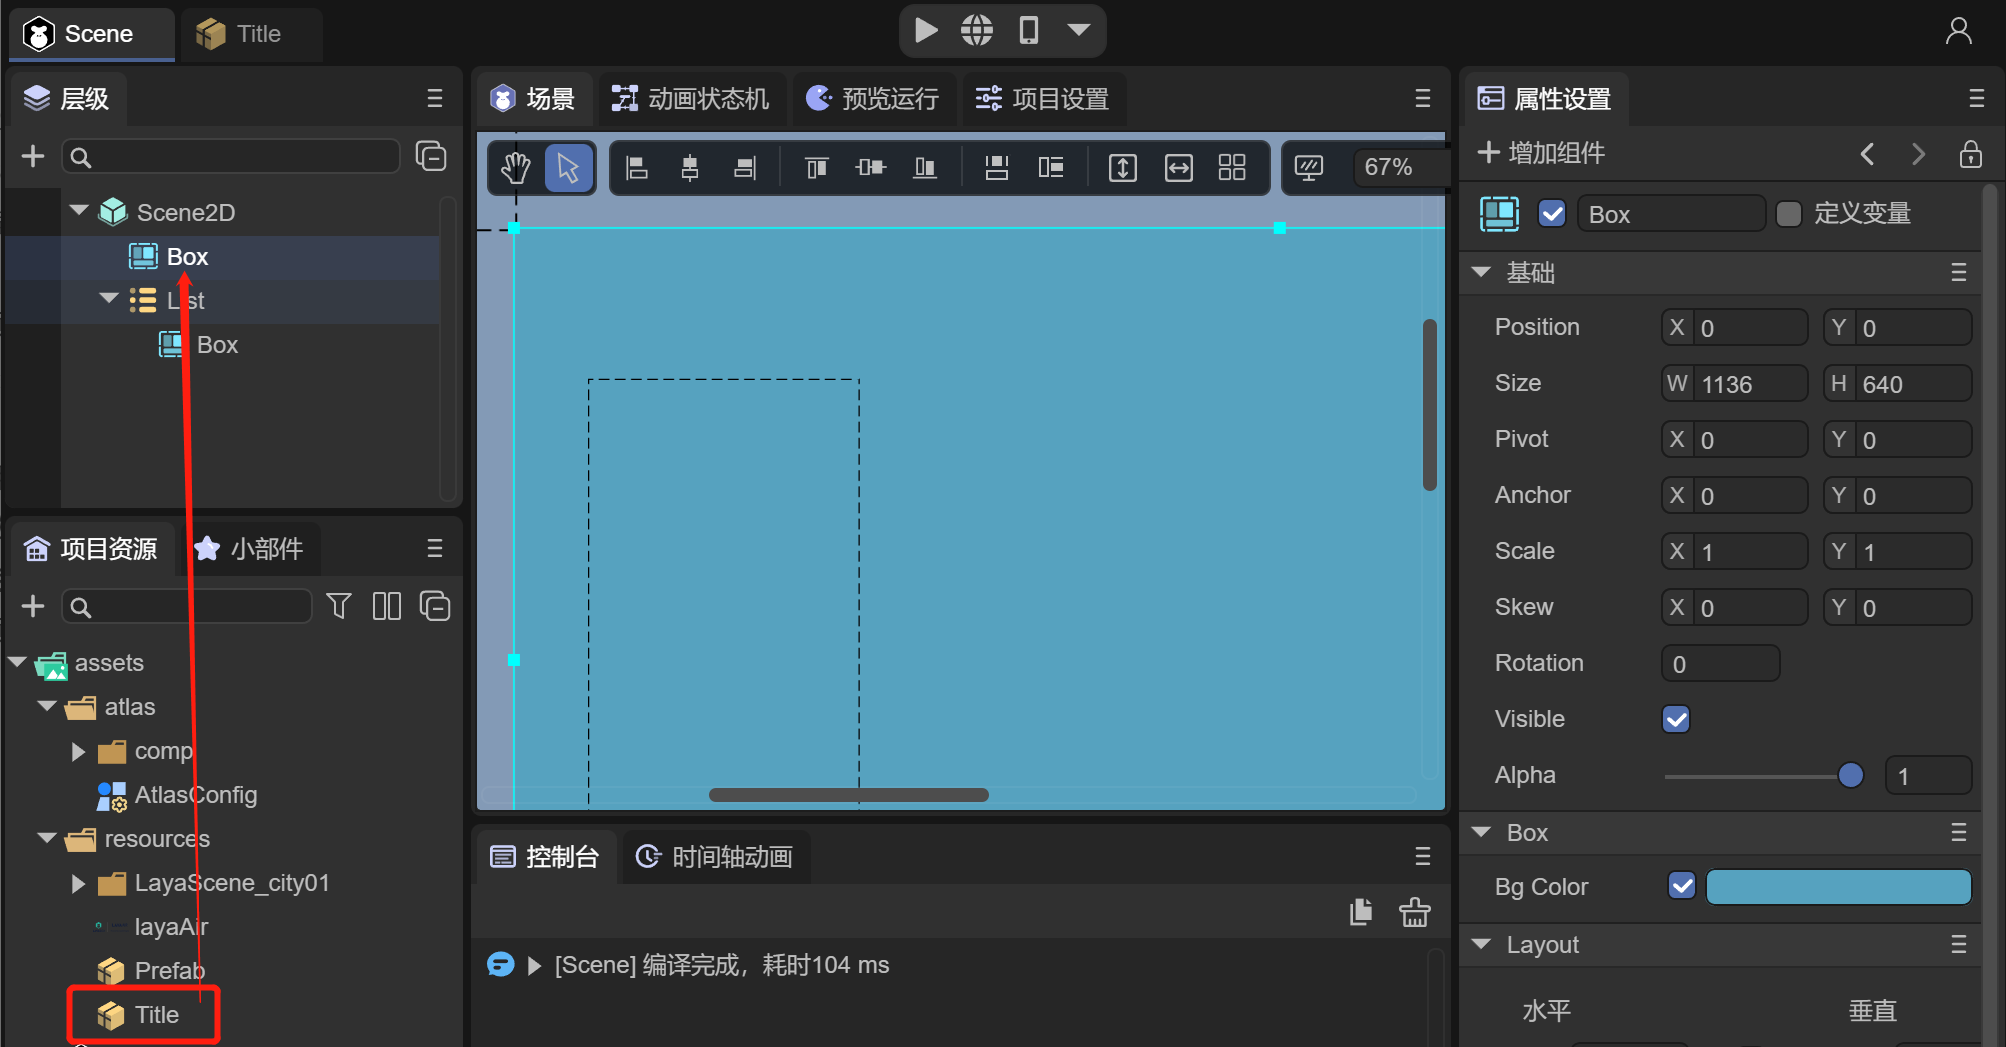
点击Title预制体,可以看到有一个根节点“Box”,如图2-3所示
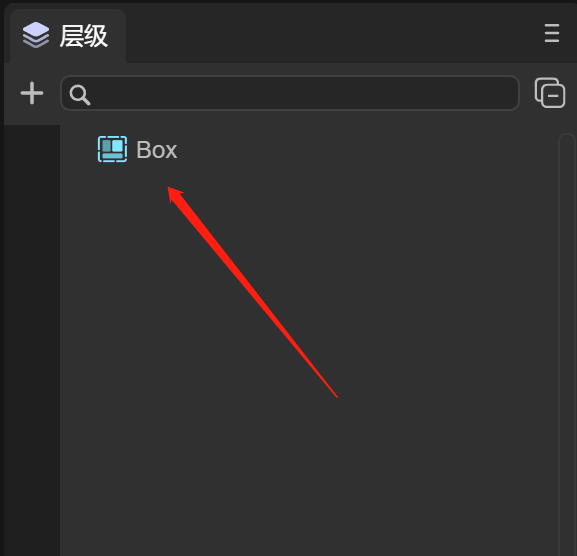
(图2-3)
开发者可以在Box下创建2D组件,或者把Box节点转换成其它2D组件来使用,后面我们将详细介绍
2.2 创建预制体(3D)
创建预制体3D的过程同预制体2D一样,如动图2-4所示

(动图2-4)
不同的是,双击打开预制体3D,根节点是“Sprite3D”,也就是我们需要创建的3D精灵对象。同时图2-5右面是默认的IDE场景,用了IDE自带的天空盒
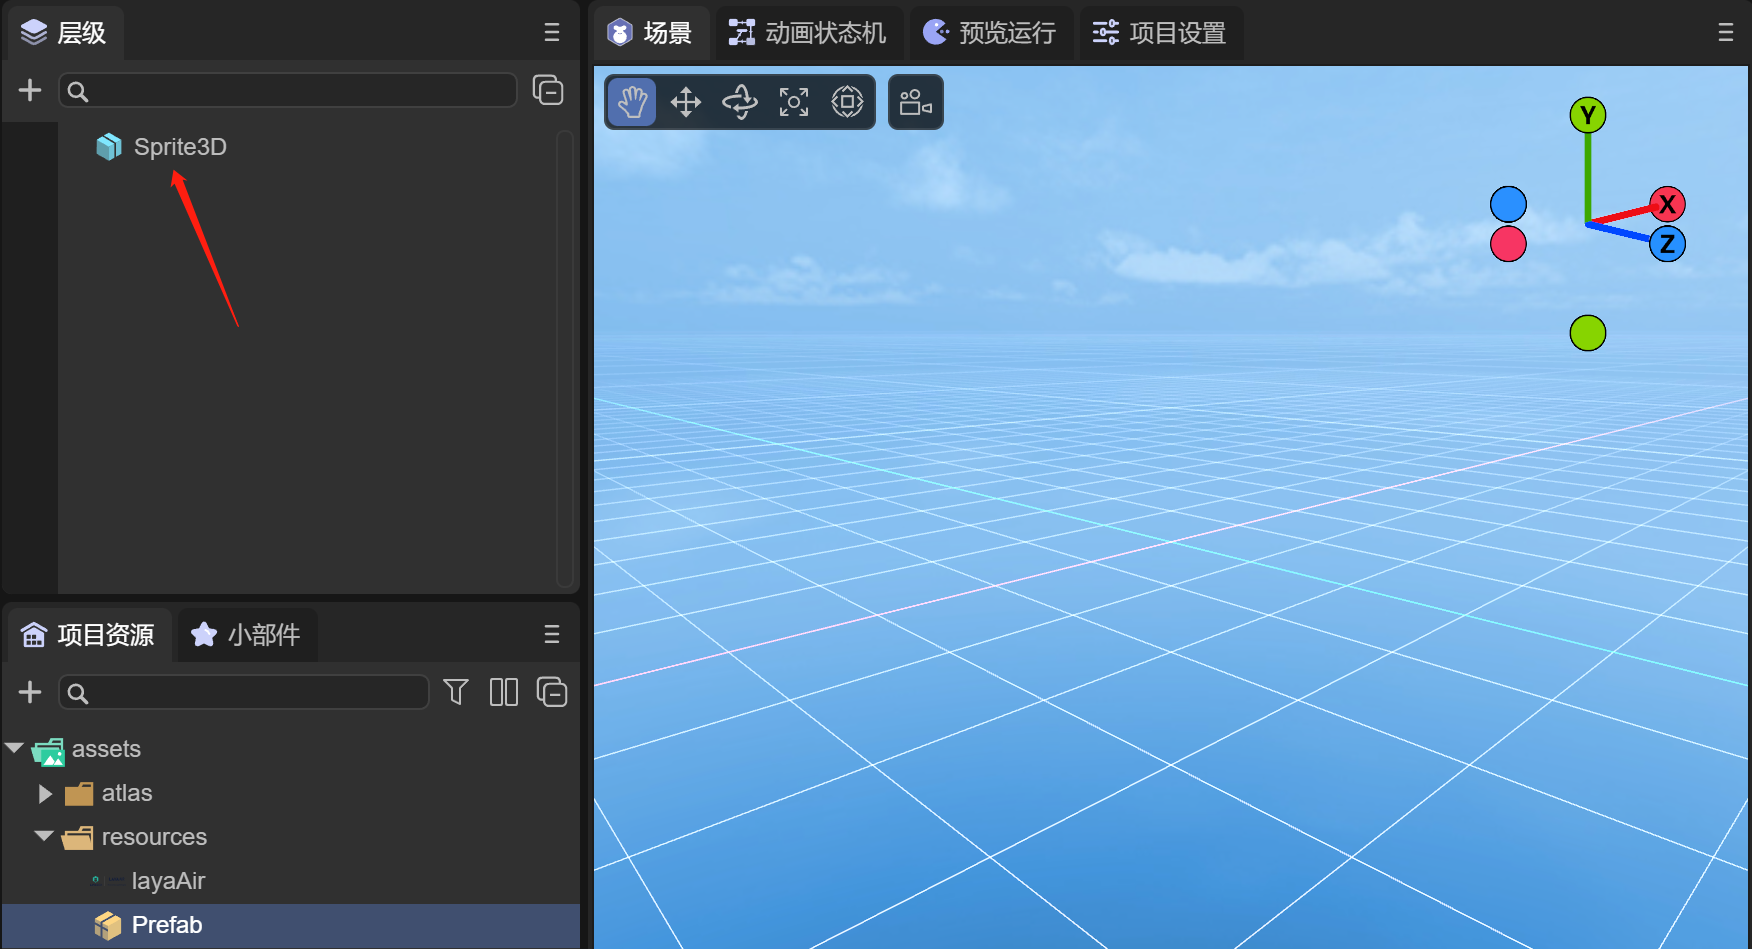
(图2-5)
2.3 修改预制体编辑场景
开发者可以通过如下的方式来更换3D预制体的编辑场景,如动图2-6所示
(动图2-6)
例如我们有一个3D的城市场景,在IDE的项目设置中 ,点击编辑选项,在预制体编辑场景中,拖入3D的城市场景文件,此时再次查看预制体的场景窗口,可以看到场景更换到3D城市了,这种情况下,可以更方便开发者更加灵活的在场景中制作3D预制体
三、使用预制体
3.1 2D预制体
第一小节中提到,由于开发过程中,会有很多界面使用类似于标题这样的字体,开发者最好通过预制体的方式来实现,当有需求改变所有界面标题的字体时,只需要修改一次预制体即可。
3.1.1 转换节点类型
由于创建的预制体默认是Box根节点,如果在Box下面创建标题的话,那么这个Box节点是多余的,如果界面中创建大量的标题,那么会创建很多的Box,对于性能的考虑来说是强烈不推荐的,因此我们希望使用转换节点来把Box改为Label组件。如动图3-1所示

(动图3-1)
3.1.2 设置字体
接下来,这里就不多介绍标题的制作过程了,如图3-2所示,我们暂时制作一个黄色的30号黑体的字体,作为标题,并改名为Title
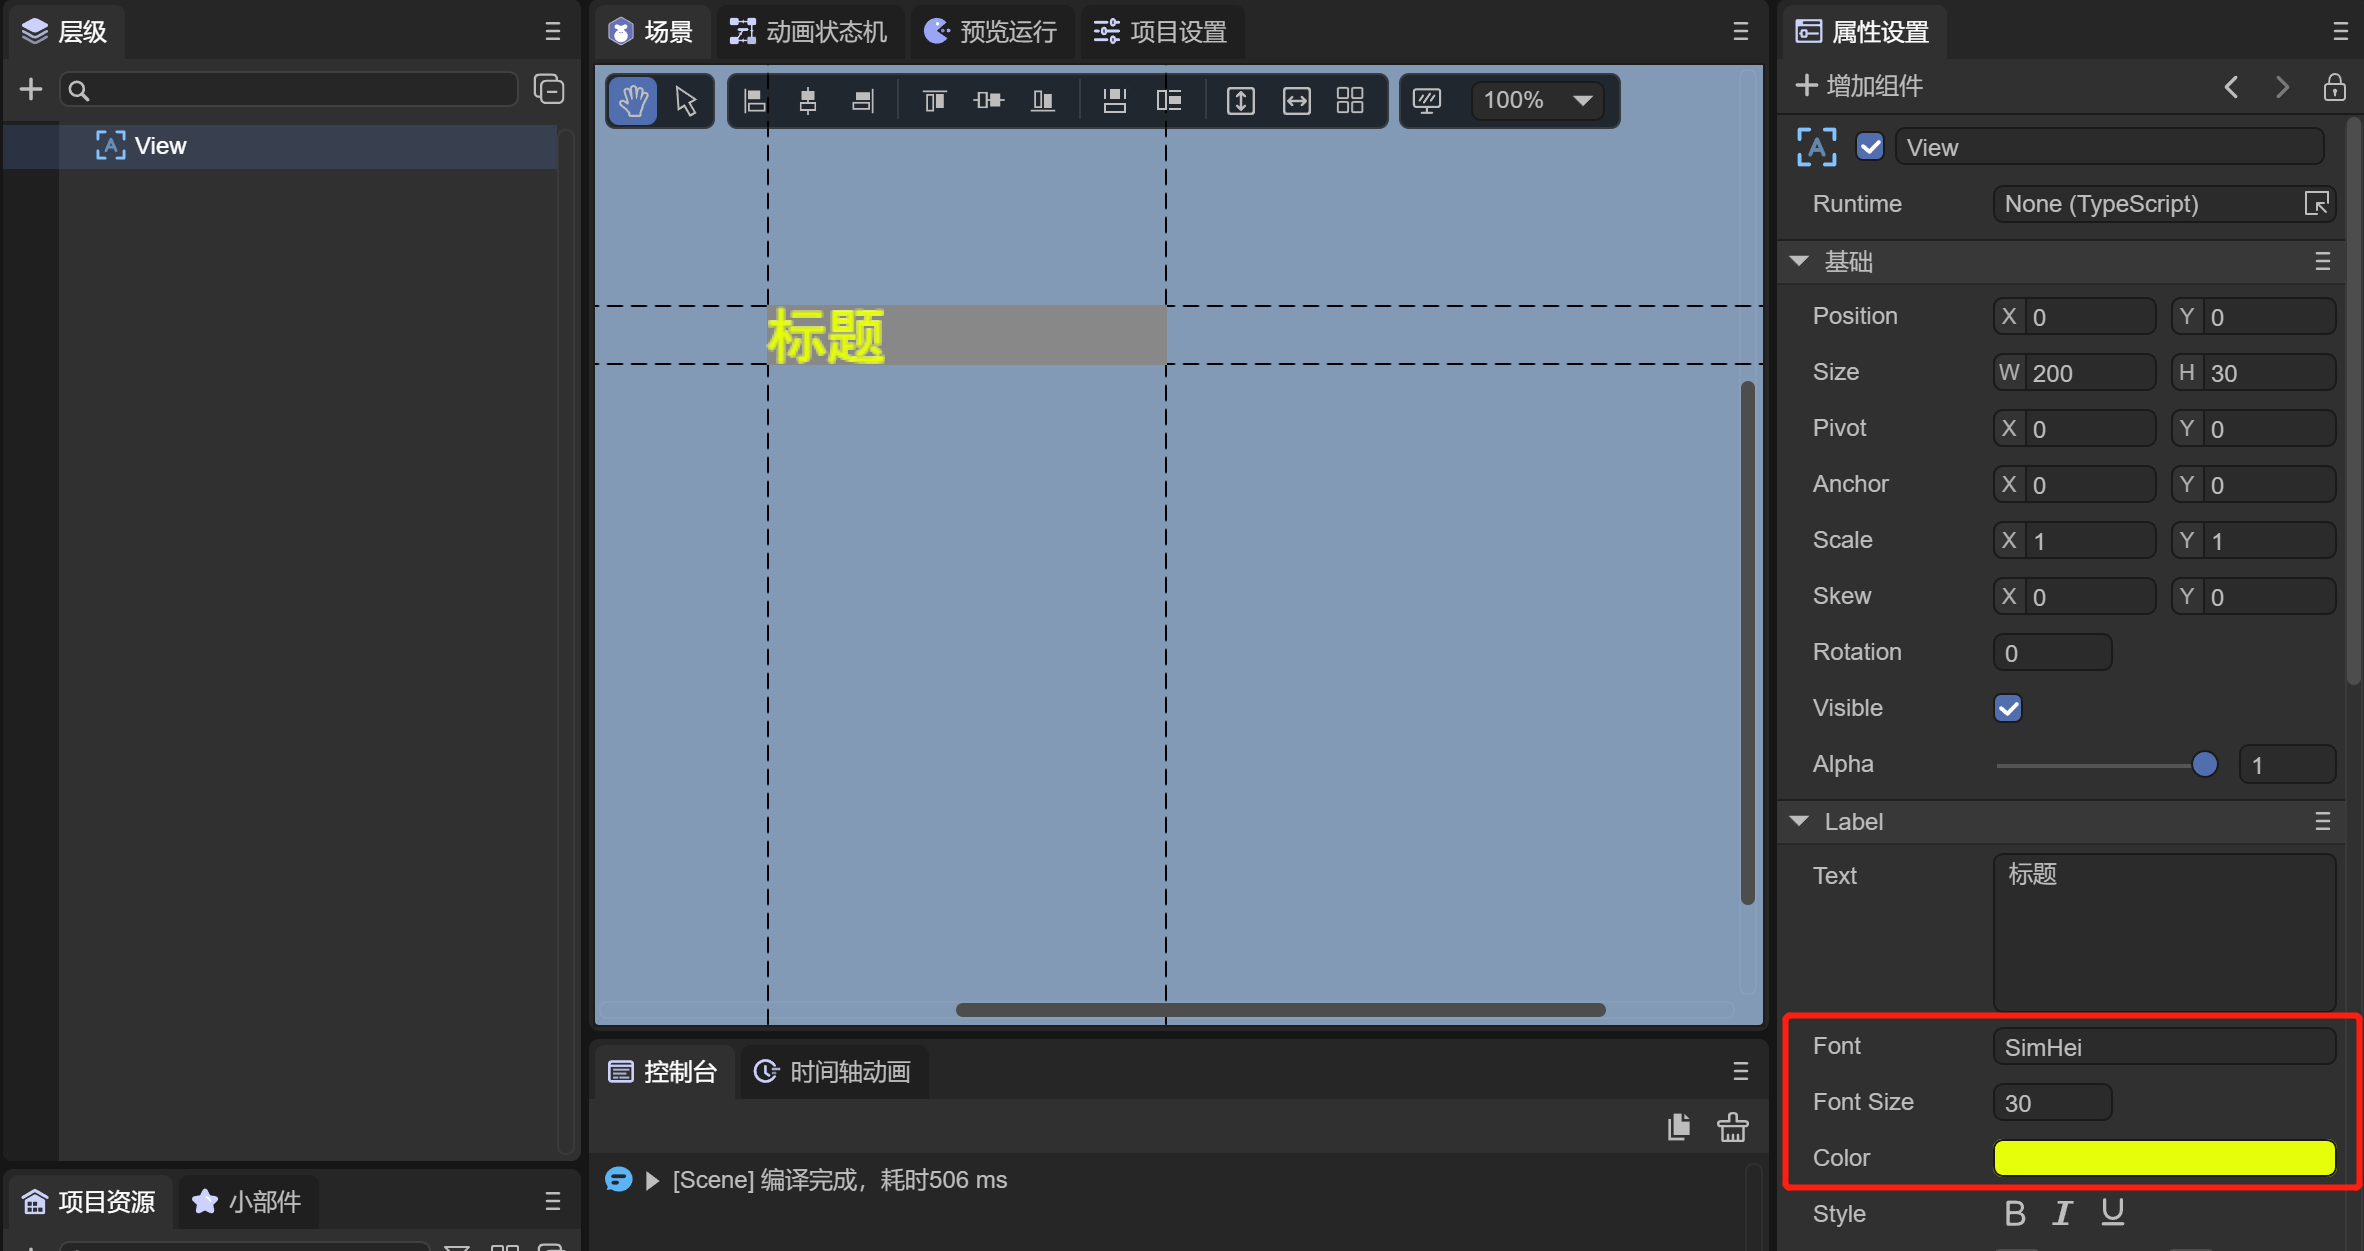
(图3-2)
3.1.3 IDE中使用预制体
当预制体制作好之后,可以在IDE中拖入到我们希望使用到的界面中,如动图3-3所示
(动图3-3)
场景中有一个List,我们希望item里会有一个标题,我们把Title预制体拖入到List的Box下,作为List的item项的Label标题。可以看到节点中,Label名字颜色是绿色的,代表这个节点是预制体节点,当然这个节点下所有的节点都会是绿色的。
3.1.4 修改预制体属性
当需求说想把所有的标题都改为红色时,也就是修改一次,多个界面跟着一起变化。那么只需要在Title预制体中修改文字的颜色即可,如动图3-4所示

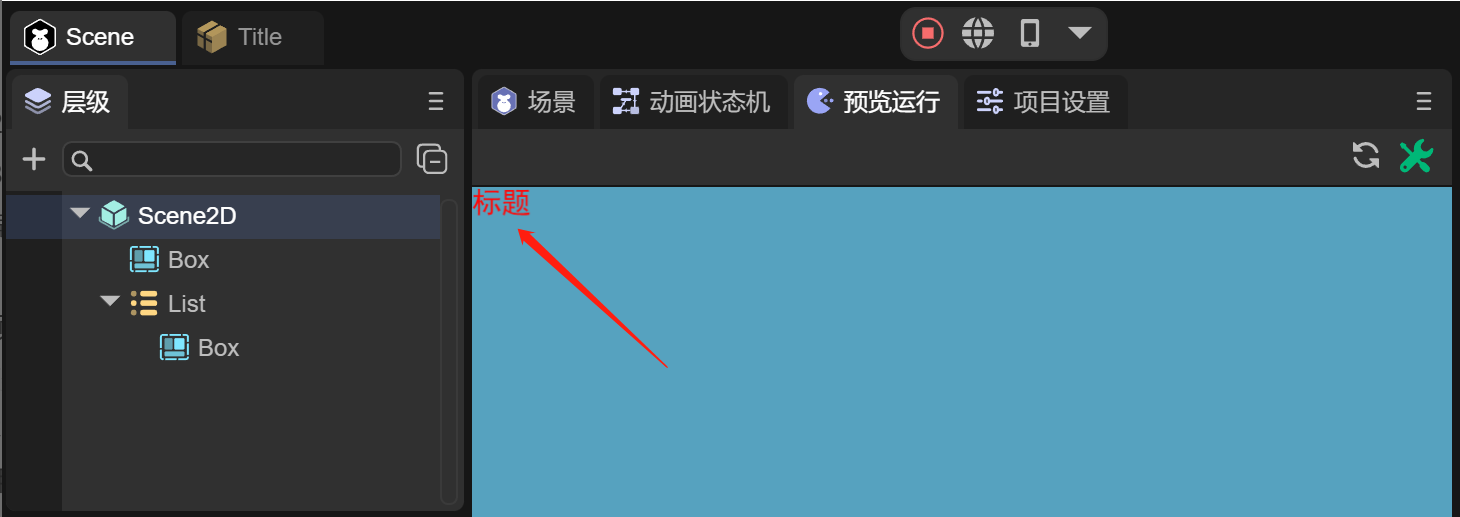
(动图3-4)
修改预制体后,就能在使用预制体的场景界面中看到修改的效果。当然,在预制体的界面也可以直接运行看效果,开发者在编辑完成后,关闭预制体界面时,需要记得保存预制体文件,否则下次打开此预制体,会丢失之前的更改。
预制体中也可以继续添加新的UI组件,同理在场景中新加的UI组件同步过来了。这里就不展示了,开发者可以自己尝试。
注意:任何UI组件上添加的脚本,也可以同步到场景中,但是预制体下的runtime类不能同步
3.1.5 覆盖预制体属性
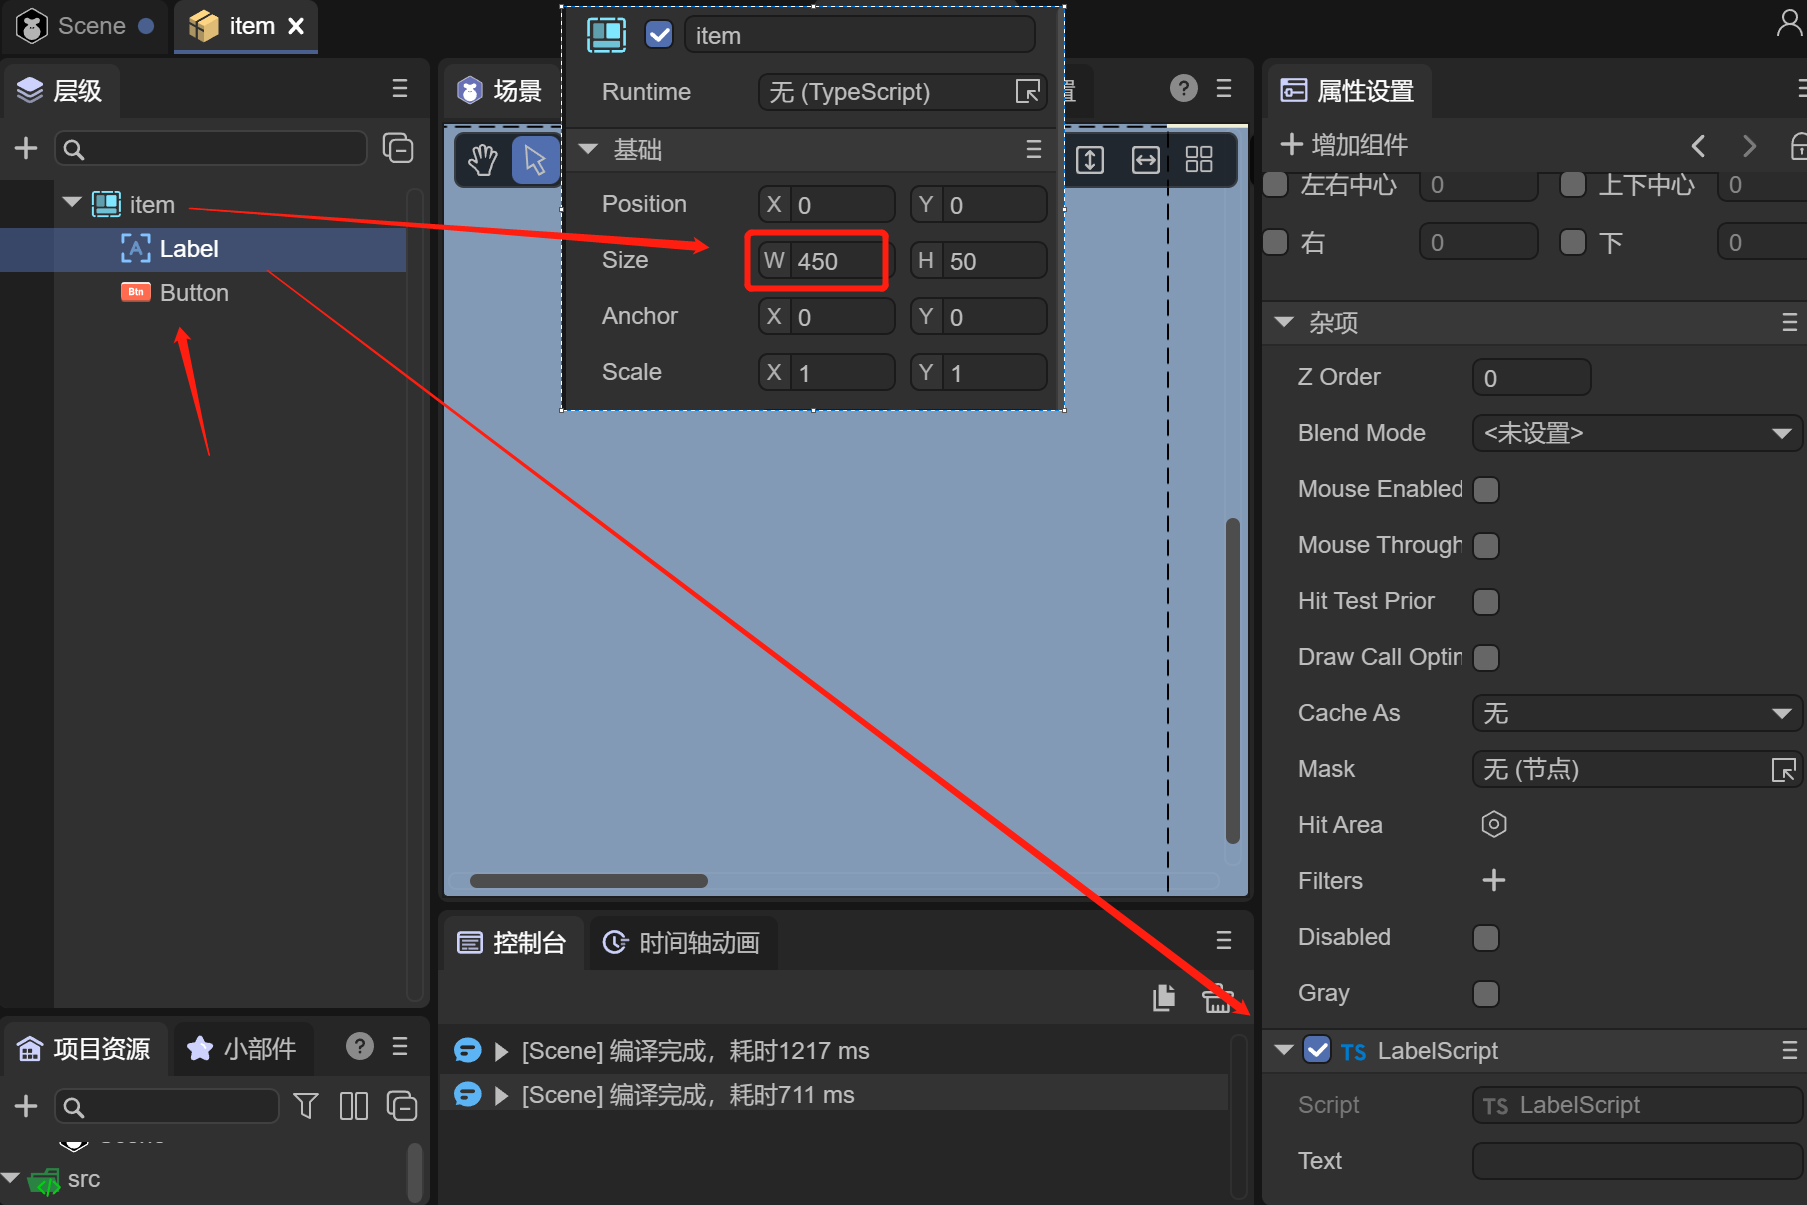
如果我们在场景中操作了预制体节点,比如新增加了UI组件,修改了UI组件的属性,UI组件上挂了脚本,如图3-3所示

(图3-3)
例如场景中List下的有个item节点为预制体,我们在List下做了几个改动,在图3-3中都会有标识
对Label组件增加了LabelScript脚本(有“+”号标识)
对item节点修改了width属性(属性设置面板有黄色线提示)
添加了Button组件(有“+”号标识)
这些修改也可以覆盖到预制体中,我们来看看如何操作。如图3-4所示
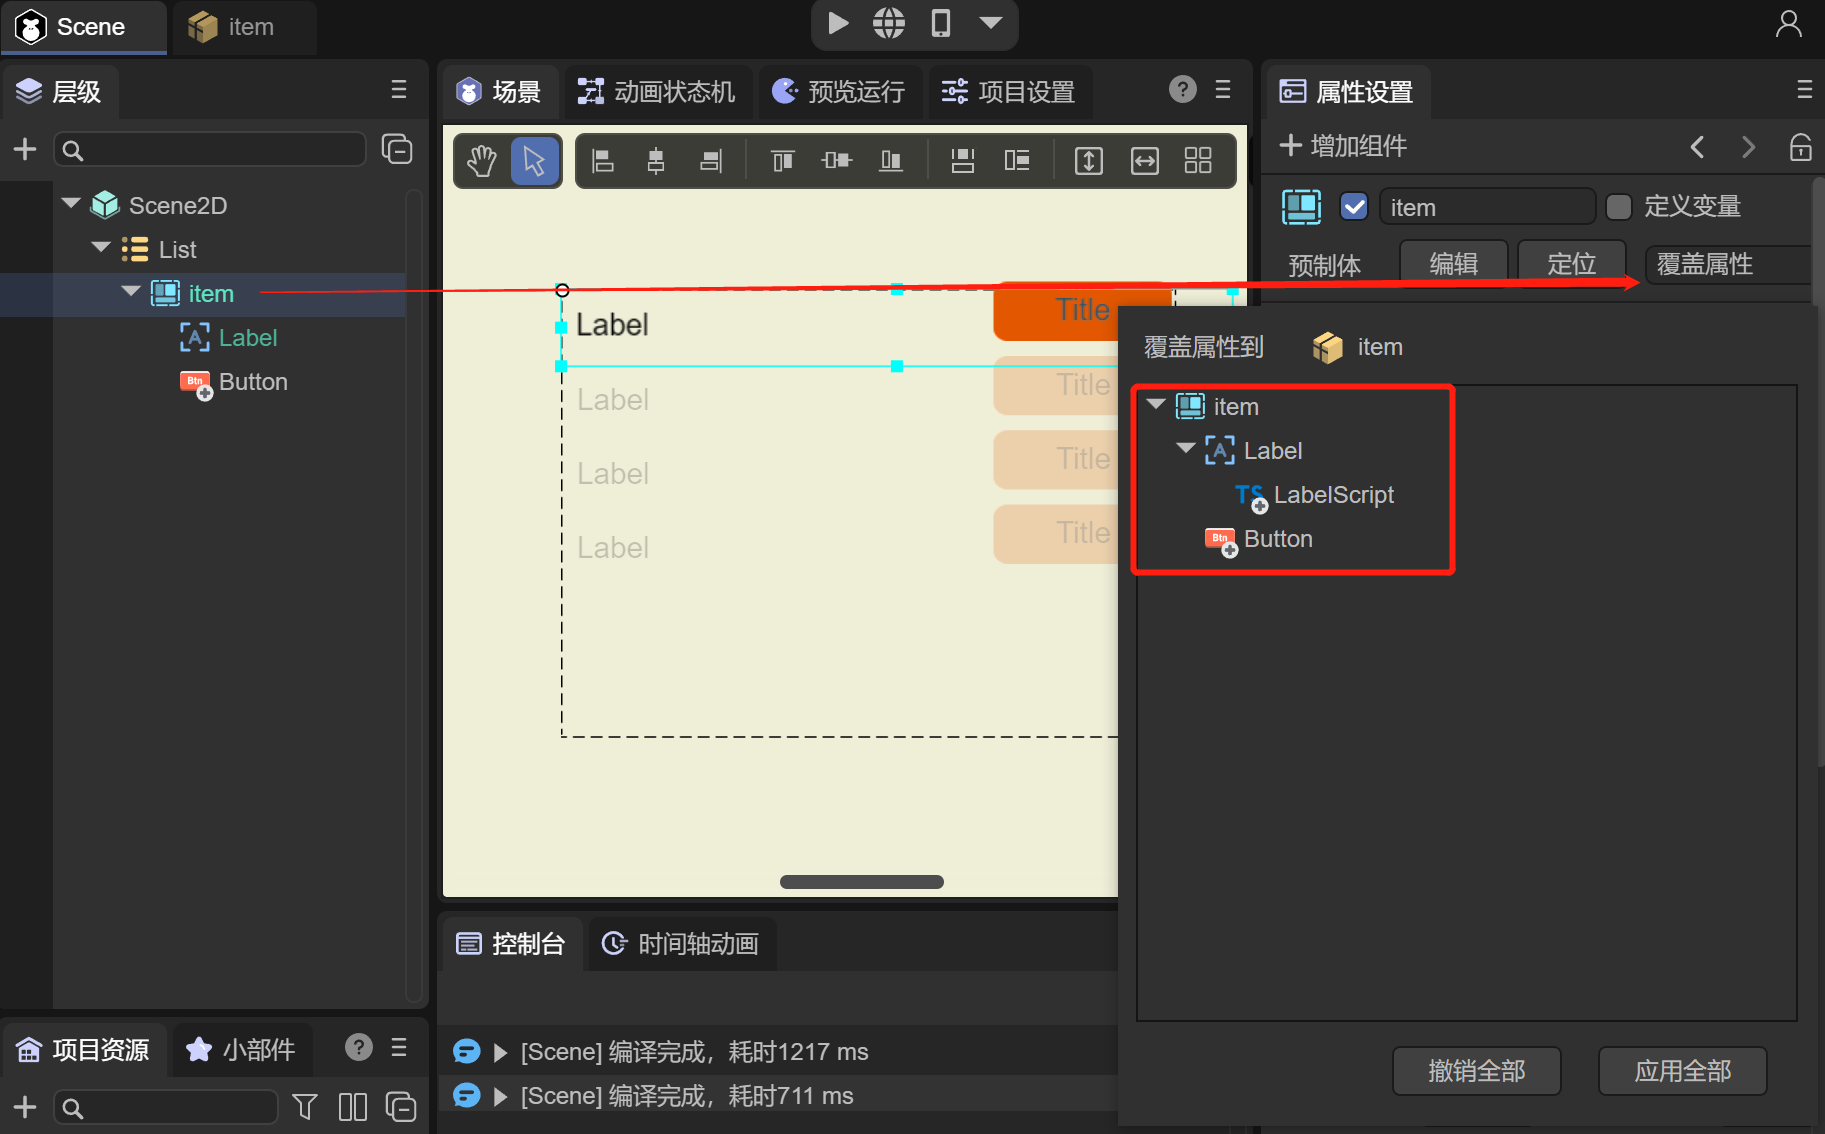
(图3-4)
点击item节点,在右边的属性面板中,点击 覆盖属性 按钮,可以打开 覆盖属性到 item 的操作面板
由于之前有三个操作,那么我们点击 item,LabelScript,Button,可以看到,如图3-8所示

(图3-8)
IDE记录了这三个修改操作,我们可以分别对每一项进行撤销或者应用,也可以直接进行撤销全部或者应用全部
当每个操作点击应用或者使用应用全部后,回到item预制体窗口后,三个修改都会更新并保存到预制体中,如图3-9所示
(图3-9)
通过上面的操作,使用覆盖预制体属性的方式,也可以达到修改预制体的效果。
注意:如果预制体里设置了相对布局,那么在场景上使用该预制体对象时,场景上的相对布局无法设置为空(IDE不勾选或强制代码设置为null都是不允许的,也无用),会以预制体内的相对布局为准。
但是,如果场景里修改了相对布局的值,会以场景上的设置为准。例如,预制体的top设置为了10,场景在使用这个预制体的时候,top改为了20,那运行的时候,场景里以20为基准。
3.1.6 代码中使用预制体
通过代码添加预制体的方式,就像使用一个组件一样简单,如图3-5所示,我们希望把Title预制体放到Box下
(动图3-5)
示例代码如下:
const { regClass, property } = Laya;

@regClass()
export class ScriptA extends Laya.Script {
    //declare owner : Laya.Sprite3D;

    @property( { type: Laya.Box } )
    private box: Laya.Box;

    constructor() {
        super();
    }

    onStart(): void {

        //加载预制体文件
        Laya.loader.load("resources/Title.lh").then( (res)=>{
            //创建预制体
            let label: Laya.Label = res.create();
            //添加预制体Label字体到box节点下
            this.box.addChild( label );
        } );
    }
}
运行效果如图3-6所示
(图3-6)
3.2 3D预制体
3D预制体的使用过程同2D预制体一样,在这里我们就不介绍如何制作预制体了,通过下面的示例来看看3D预制体的使用效果
3.2.1 IDE中使用
假设我们已经创建了3D预制体,并通过添加模型,材质,动画状态机等组件,制作了LayaMonkey,如图3-7所示
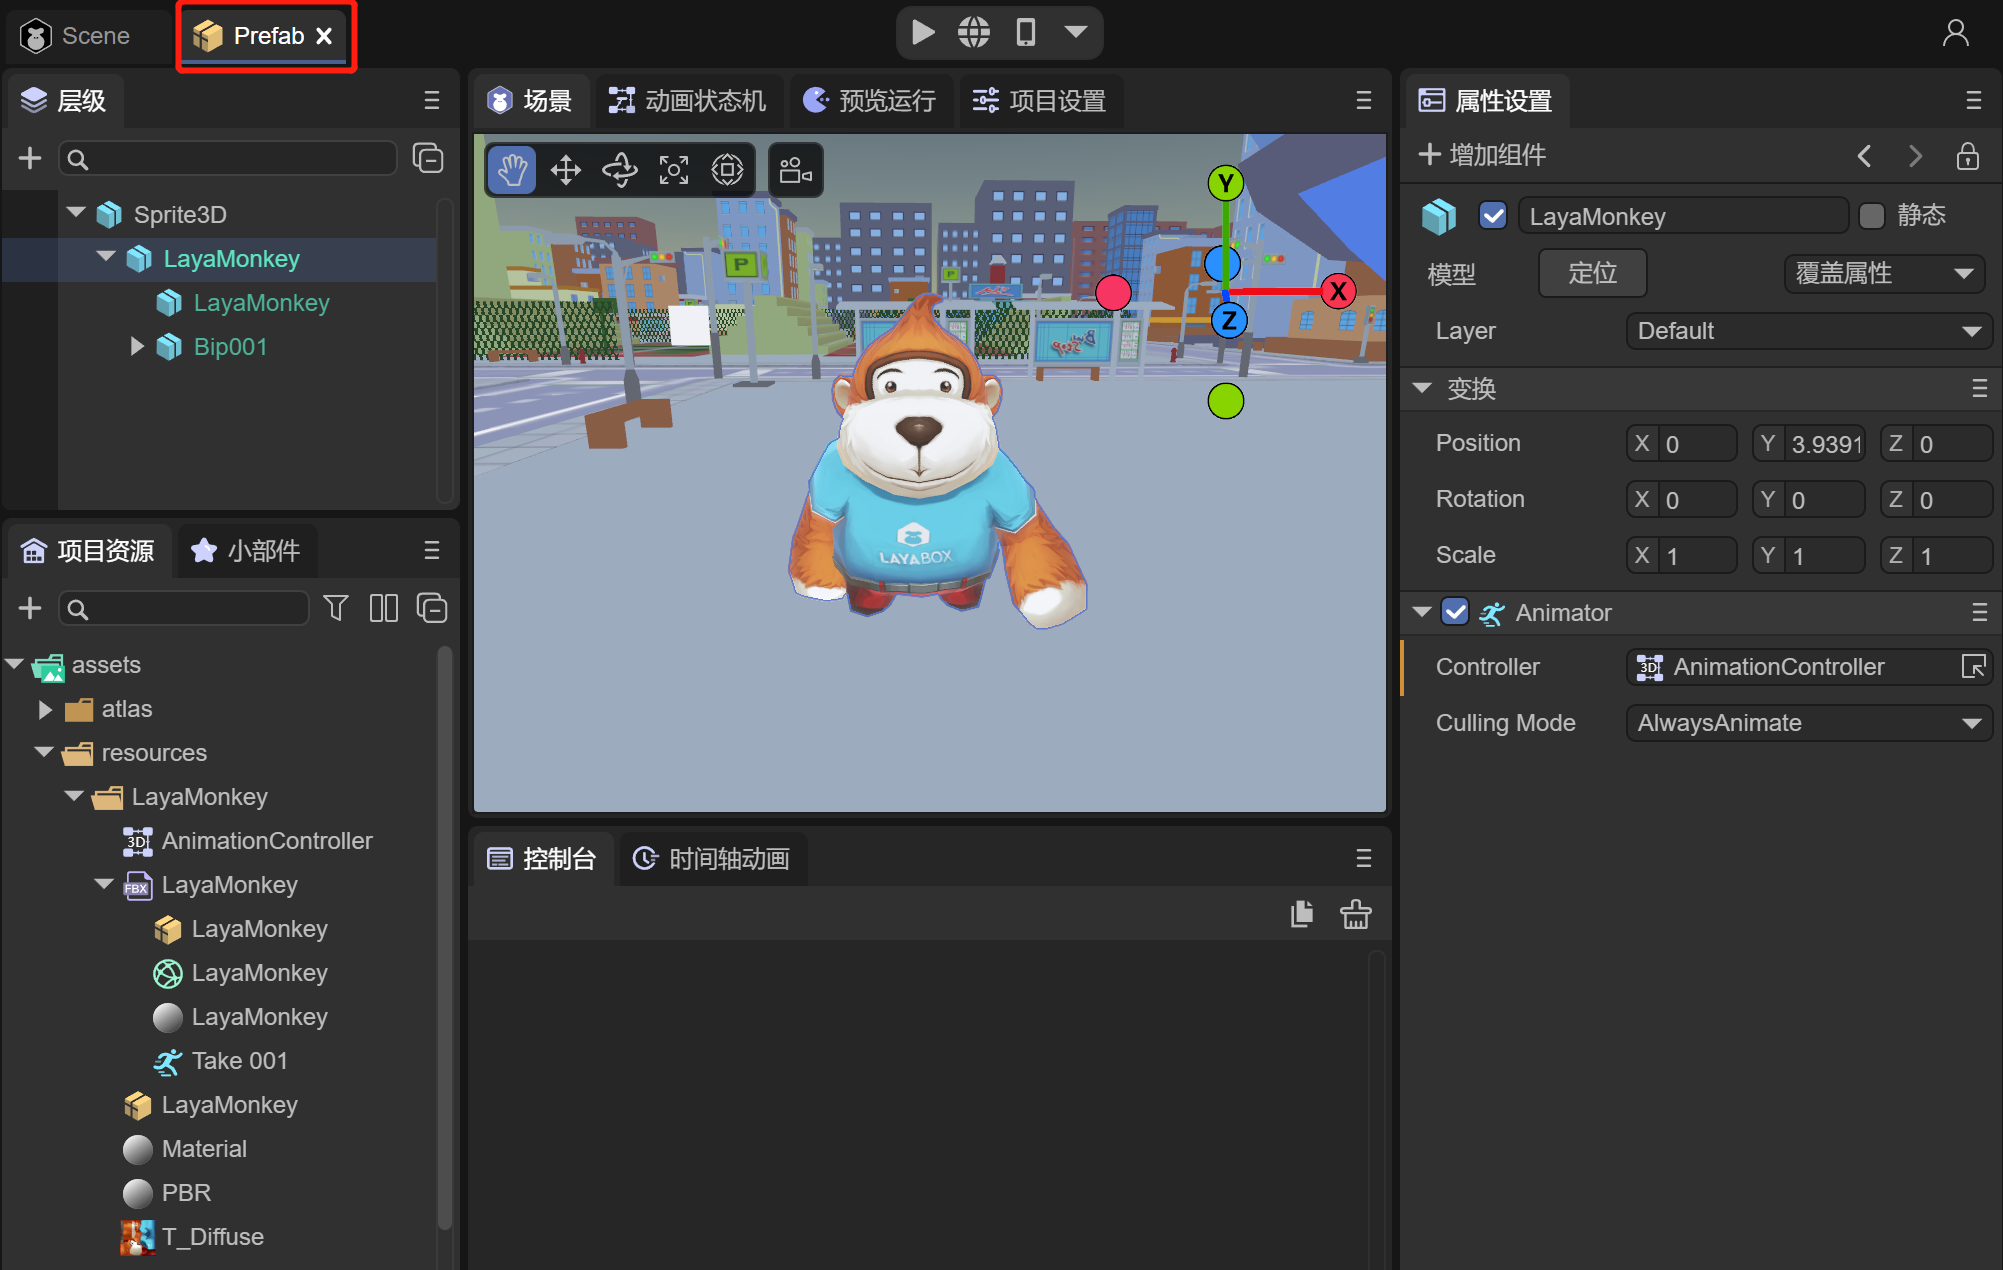
(图3-7)
此时,制作好的LayaMonkey可以拖入任何场景中,如动图3-8所示

(动图3-8)
3.2.2 代码中使用
通过代码使用3D预制体是最常用的方式,往往在游戏战斗中的敌人是通过代码不断创建的,像上述IDE拖入LayaMonkey的情况,我们用代码来实现如下:
const { regClass, property } = Laya;

@regClass()
export class Main extends Laya.Script {

    @property( { type : Laya.Camera } )
    private camera: Laya.Camera;
    @property( { type : Laya.Scene3D } )
    private scene: Laya.Scene3D;

    onStart() {
        console.log("Game start");
        //加载预制体文件
        Laya.loader.load("resources/Prefab.lh").then( (res)=>{
            //创建预制体
            let monkey: Laya.Sprite3D = res.create();
            //添加预制体到场景中
            this.scene.addChild( monkey );
            monkey.transform.position = new Laya.Vector3(-28.9354,0.3,-63.20264);
        } );
    }
}
运行效果如动图3-9
(动图3-9)
四、预加载预制体
在开发过程中,我们会通过大量创建预制体的方式来实现各种功能,因此预制体也可以理解为一组资源的集合体,通过代码加载预制体文件时,可以一同加载所关联资源。因此在项目启动加载过程中,可以直接先加载所有的预制体,就像预加载场景一样,引擎会把关联的资源一起加载。
在LayaAir的2D入门示例代码中,可以看到,通过预加载一组预制体的实现代码:
import { LoadingRTBase } from "./LoadingRT.generated";

const { regClass, property } = Laya;
@regClass()
export default class LoadingRT extends LoadingRTBase {
    onAwake(): void {
        Laya.loader.load(
            //先加载本场景要用的
            ["resources/UI/image.png", "resources/UI/progress.png", "resources/UI/progress$bar.png"]
        ).then(() => {
            let resArr: Array<any> = [

                { url: "resources/prefab/uiDemo/useUI/ChangeTexture.lh", type: Laya.Loader.HIERARCHY },
                { url: "resources/prefab/uiDemo/useUI/MouseThrough.lh", type: Laya.Loader.HIERARCHY },
                { url: "resources/prefab/uiDemo/useUI/PhysicalCollision.lh", type: Laya.Loader.HIERARCHY },
                { url: "resources/prefab/uiDemo/useUI/Progress.lh", type: Laya.Loader.HIERARCHY },
                { url: "resources/prefab/uiDemo/useUI/TextShow.lh", type: Laya.Loader.HIERARCHY },
                { url: "resources/prefab/uiDemo/page/IframeElement.lh", type: Laya.Loader.HIERARCHY },
                { url: "resources/prefab/uiDemo/page/UsePanel.lh", type: Laya.Loader.HIERARCHY },
                { url: "resources/prefab/uiDemo/list/BagList.lh", type: Laya.Loader.HIERARCHY },
                { url: "resources/prefab/uiDemo/list/ComboBox.lh", type: Laya.Loader.HIERARCHY },
                { url: "resources/prefab/uiDemo/list/LoopList.lh", type: Laya.Loader.HIERARCHY },
                { url: "resources/prefab/uiDemo/list/MailList.lh", type: Laya.Loader.HIERARCHY },
                { url: "resources/prefab/uiDemo/list/Refresh.lh", type: Laya.Loader.HIERARCHY },
                { url: "resources/prefab/uiDemo/list/TreeBox.lh", type: Laya.Loader.HIERARCHY },
                { url: "resources/prefab/uiDemo/list/TreeList.lh", type: Laya.Loader.HIERARCHY },
                { url: "resources/prefab/uiDemo/animation/AtlasAni.lh", type: Laya.Loader.HIERARCHY },
                { url: "resources/prefab/uiDemo/animation/FrameAni.lh", type: Laya.Loader.HIERARCHY },
                { url: "resources/prefab/uiDemo/animation/SkeletonAni.lh", type: Laya.Loader.HIERARCHY },
                { url: "resources/prefab/uiDemo/animation/TimelineAni.lh", type: Laya.Loader.HIERARCHY },
                { url: "resources/prefab/uiDemo/animation/TweenAni.lh", type: Laya.Loader.HIERARCHY },
                { url: "resources/prefab/uiDemo/interactive/Astar.lh", type: Laya.Loader.HIERARCHY },
                { url: "resources/prefab/uiDemo/interactive/Joystick.lh", type: Laya.Loader.HIERARCHY },
                { url: "resources/prefab/uiDemo/interactive/ShapeDetection.lh", type: Laya.Loader.HIERARCHY },
                { url: "resources/prefab/uiDemo/interactive/tiledMap.lh", type: Laya.Loader.HIERARCHY },

                { url: "resources/prefab/Bullet.lh", type: Laya.Loader.HIERARCHY },
                { url: "resources/prefab/closeBtn.lh", type: Laya.Loader.HIERARCHY },
                { url: "resources/prefab/ComboList.lh", type: Laya.Loader.HIERARCHY },
                { url: "resources/prefab/defaultButton.lh", type: Laya.Loader.HIERARCHY },
                { url: "resources/prefab/defaultLabel.lh", type: Laya.Loader.HIERARCHY },
                { url: "resources/prefab/DropBox.lh", type: Laya.Loader.HIERARCHY },
                { url: "resources/prefab/LoopImg.lh", type: Laya.Loader.HIERARCHY },
                { url: "resources/prefab/role.lh", type: Laya.Loader.HIERARCHY },

                { url: "resources/prefab/ani/cd.lh", type: Laya.Loader.HIERARCHY },
                { url: "resources/prefab/ani/refresh.lh", type: Laya.Loader.HIERARCHY },

            ];


            //3.0的load,同时可以加载2D,3D资源
            Laya.loader.load(resArr, null, Laya.Handler.create(this, this.onLoading, null, false)).then(() => {
                // 加载完成后,处理逻辑
                this.progress.value = 0.98;
                console.log("加载结束", this.progress.value);
                //预加载的东西太少,为了本地看效果延迟一秒,真实项目不需要延迟
                Laya.timer.once(1000, this, () => {
                    //跳转到入口场景
                    Laya.Scene.open("Scenes/Index.ls"); //不要使用Laya.Scene.open("./Scenes/Index.ls");
                });

            });

            // 侦听加载失败
            Laya.loader.on(Laya.Event.ERROR, this, this.onError);
        });
    }

    /**
   * 当报错时打印错误
   * @param err 报错信息
   */
    onError(err: string): void {
        console.log("加载失败: " + err);
    }

    /**
     * 加载时侦听
     */
    onLoading(progress: number): void {
        //接近完成加载时,让显示进度比实际进度慢一点,这是为打开场景时的自动加载预留,尤其是要打开的场景资源多,并没有完全放到预加载中,还需要再自动加载一部分时。
        if (progress > 0.92) this.progress.value = 0.95;
        else this.progress.value = progress;
        console.log("加载进度: " + progress, this.progress.value);
    }
}
通过上述代码,可以在浏览器中的调试工具中看到引擎会加载全部预制体的资源。