使用3D精灵(Sprite3D)
一、概述
Sprite3D 是3D的基本节点对象,就像Sprite是2D的基本节点对象一样,是LayaAir3D中所有3D节点的父类,包含很多3D精灵基本的功能属性,除此之外还是所有3D组件和脚本的容器。
在LayaAir 3.0编辑器中,我们可以通过鼠标右键来创建一个Sprite3D,如动图1-1所示
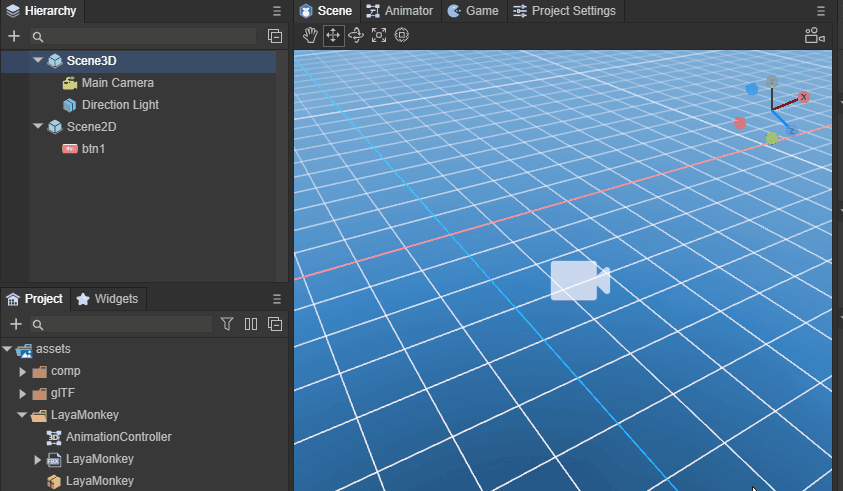
(动图1-1)
创建好的Sprite3D,在编辑器场景中,Scene3D下会是一个空节点,如图1-2所示
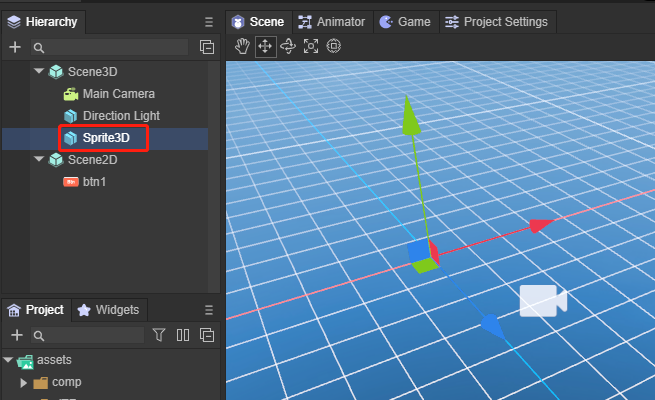
(图1-2)
基本上我们创建一个Sprite3D空节点的最重要的目的是作为一个根节点,一个项目中会有很多不同功能的根节点,来方面我们管理。另外也可以用Sprite3D来添加组件,下面我们会详细介绍Sprite3D的用途。
二、属性和功能
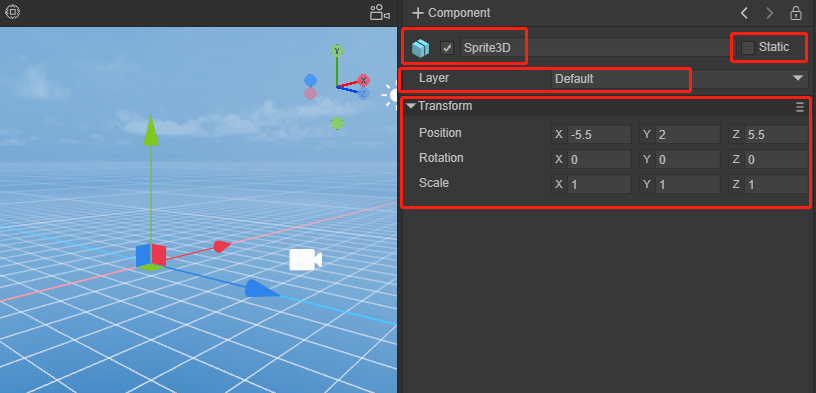
(图2-1)
图2-1中,可以看到Sprite3D作为一个最基础的3D节点,都具备哪些属性,其它更丰富的3D节点都具备这些属性
2.1 节点的名字
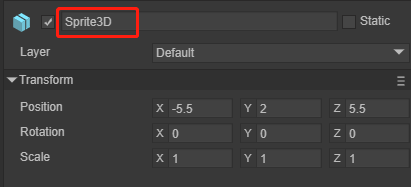
(图2-2)
图2-2中,任何一个节点都有名字,通过名字可以方便的来查找一个节点下是否存在某个名字的子节点,通常会调用如下方法来获取子节点 getChildByName("xxx")
    /**
     * 根据子节点的名字,获取子节点对象。
     * @param    name 子节点的名字。
     * @return    节点对象。
     */
    getChildByName(name: string): Node {
        for (let child of this._children) {
            if (child && child.name === name)
                return child;
        }
        return null;
    }
当我们找到子节点时,也可以对节点做一些基础操作,比如删除掉自己方法 removeSelf()
    /**
     * 从父容器删除自己,如已经被删除不会抛出异常。
     * @return 当前节点( Node )对象。
     */
    removeSelf(): Node {
        this._parent && this._parent.removeChild(this);
        return this;
    }
具体一个Sprite3D都有哪些基础方法,可以去参考Node节点的基础属性。
2.2 是否激活
(图2-3)
图2-3中,任何节点,都可以通过勾选是否激活来作用于场景中,当不激活某个节点时,下面的所有子节点也会随着根节点处于不激活状态。当然我们也可以通过代码来控制
    /**
     * 获取自身是否激活。
     *   @return    自身是否激活。
     */
    get active(): boolean

    /**
     * 设置是否激活。
     * @param    value 是否激活。
     */
    set active(value: boolean)
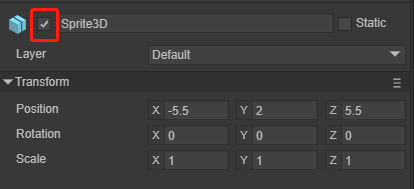
2.3 是否为静态
(图2-4)
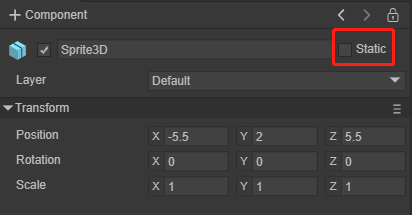
图2-4所示,是否为静态。在游戏场景中,每一个Sprite3D都有静态或者动态的两种状态,当一个物体标记为static后,就确保这个物体在游戏场景中为静态的、不会移动的物体,进而在游戏的运行过程中让游戏有更加流畅的运行体验。一般而言,在场景中完全静止的物体标记成static是比较好的。这个静止指在游戏运行过程中没有发生移动或者缩放或者旋转等,一般将用于烘焙的节点标记为static。
标记成 static 往往是为了提高效率,比如静态物体的碰撞检测要更快,同时多个使用同一材质的静态物体在绘制的时候只使用一个drawcall,进而节省了CPU。在光照计算上,static的物体也更快一些。
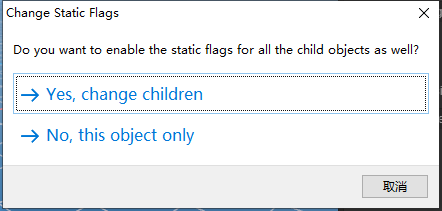
另外,当勾选Static时,编辑器会询问是否同时改变所有子对象的静态标志,如图2-5所示
(图2-5)
当然也可以用代码来控制
    /**
     * 是否为静态。
     */
    get isStatic(): boolean

    /**
     * 是否设为静态。
     */
    set isStatic(value: boolean)
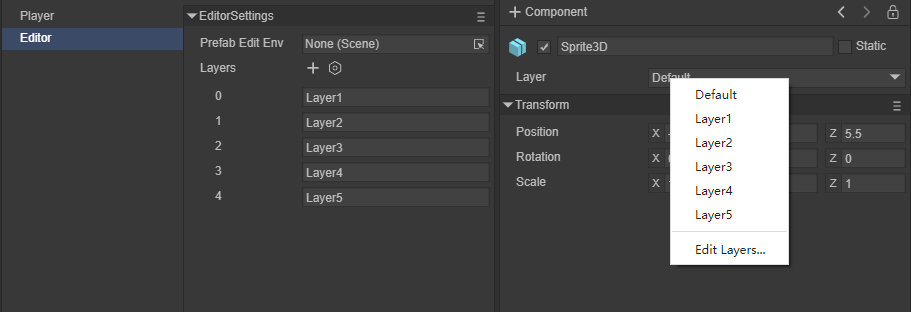
2.4 蒙版层
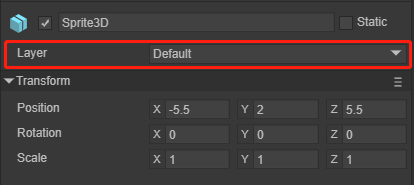
(图2-6)
图2-6中,是精灵所在的图层 Layer。渲染相机可进行可视遮罩层的控制,对精灵的渲染与否进行控制,可以参考摄像机文档,其中有对设置不同物体蒙版层后,摄像机选择不同蒙版层的示例。如动图2-7所示
(动图2-7)
如图2-8所示,通过点击Layer,可以选择编辑器已经自定义好的Default,Layer1等等,也可以再次编辑Layer层
(图2-8)
也可以通过代码来设置
    /**
     * 蒙版层。
     */
    get layer(): number

    set layer(value: number)

    //添加显示图层(为相机添加一个蒙版)
    this.camera.addLayer(5);
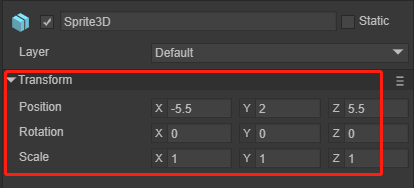
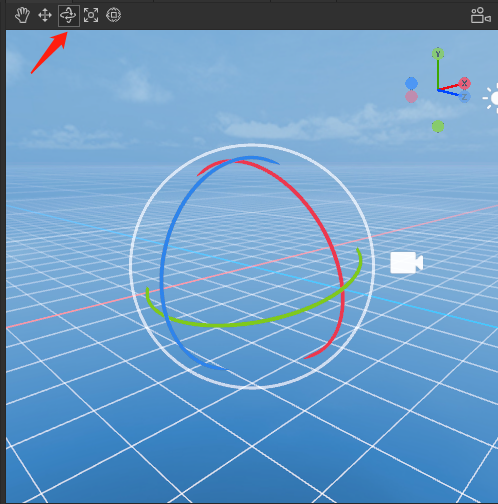
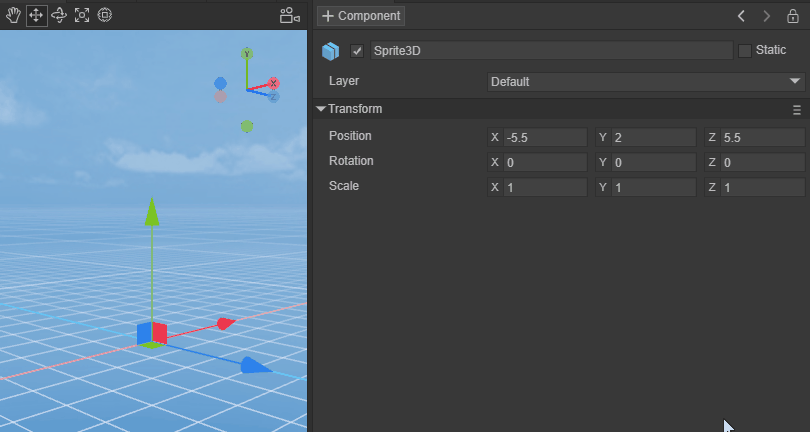
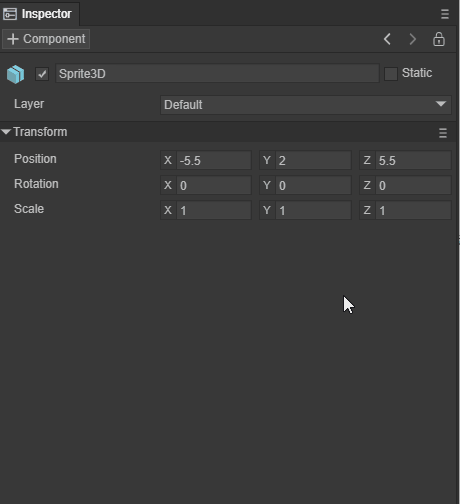
2.5 变换
变换组件确定场景中每个精灵的位置,旋转和缩放。同时和Node节点一样具备子父节点的关联关系,使变换操作更灵活,每个精灵都有一个Transform3D。
(图2-9)
我们也可以在编辑器里手动调整精灵的变换
(图2-10)
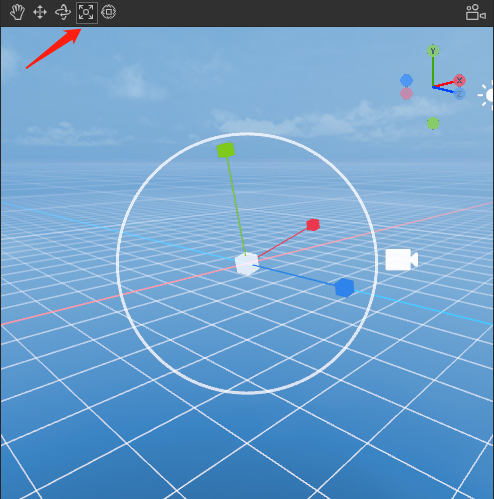
(图2-11)
图2-10用来调整精灵的旋转,图2-11用来调整精灵的缩放
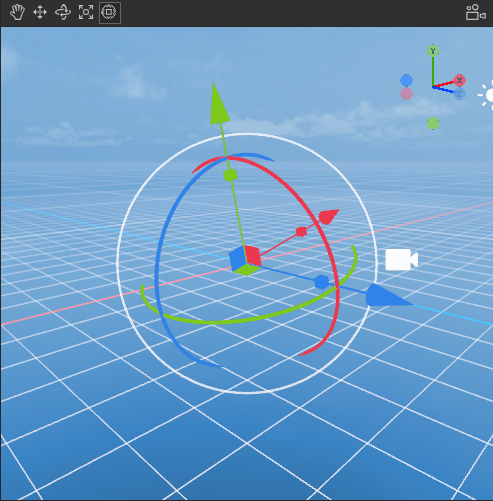
(图2-12)
图2-12可同时用来调整精灵的位置,旋转和缩放。
通过代码,来做变换
//平移
this.position1.setValue(-1.5, 0, 0.0);
this.sprite3d.translate(this.position1);
//旋转
this.rotate1.setValue(0, 60, 0);
this.sprite3d.rotate(this.rotate1, false, false);
//缩放
var scale = this.sprite3d.localScale;
scale.setValue(0.1, 0.1, 0.1);
this.sprite3d.localScale = scale;
三、子父级关系
Sprite3D继承自Node节点,是LayaAir3D中所有3D对象的父类。通过一些示例,我们可以了解子父级关系。

(动图3-1)
通过点击按钮,让父节点移动,同时可以看到子节点也跟随移动
this.layaMonkeyParent.transform.translate(new Laya.Vector3(-0.2, 0, 0);
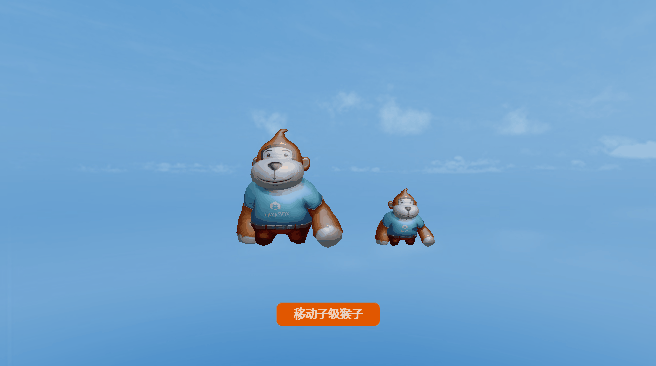
(动图3-2)
通过点击按钮,让子节点移动,可以看到父节点并没有移动
this.layaMonkeySon.transform.translate(new Laya.Vector3(-0.2, 0, 0);
四、克隆
关于克隆,LayaAir3D中提供了几种接口。比较常用的是clone方法
    /**
     * 克隆。
     * @return     克隆副本。
     */
    clone(): Node {
        var dstSprite3D: Node = Sprite3D._createSprite3DInstance(this);
        Sprite3D._parseSprite3DInstance(this, dstSprite3D, this, dstSprite3D);
        return dstSprite3D;
    }
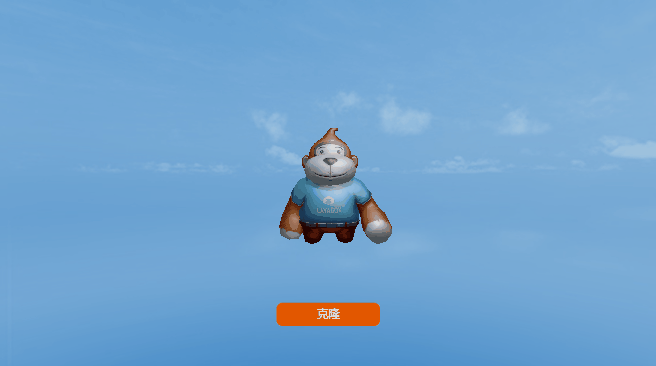
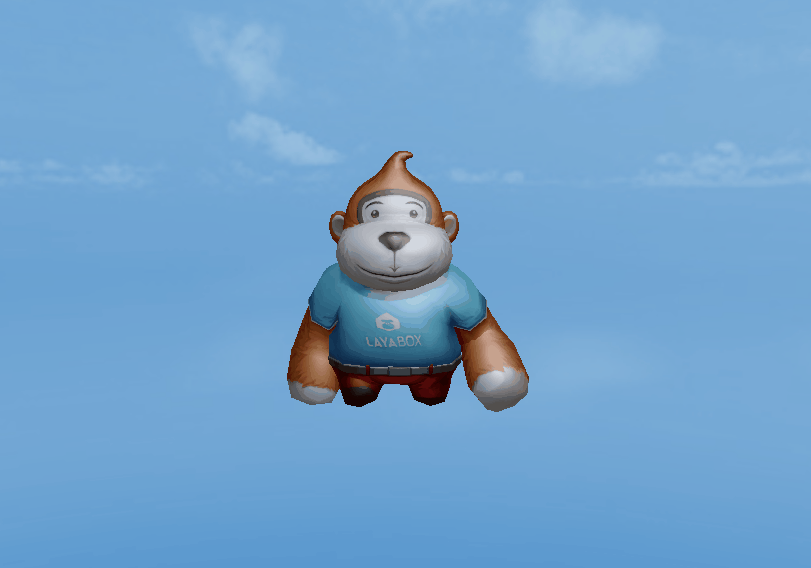
(动图4-1)
通过代码来克隆一个猴子
//克隆一个猴子
let sp = this.layaMonkeyParent.clone() as Laya.Sprite3D;
//设置克隆猴子的坐标
sp.transform.position = new Laya.Vector3(1,0,0);
//添加到场景中
this.scene.addChild(sp);
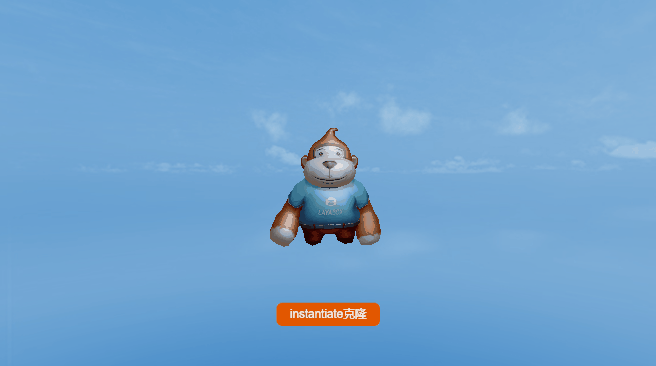
其次,这里详细讲解下Sprite3D中特有的克隆接口instantiate
    /**
     * 创建精灵的克隆实例。
     * @param    original  原始精灵。
     * @param   parent    父节点。
     * @param   worldPositionStays 是否保持自身世界变换。
     * @param    position  世界位置,worldPositionStays为false时生效。
     * @param    rotation  世界旋转,worldPositionStays为false时生效。
     * @return  克隆实例。
     */
    static instantiate(original: Sprite3D, parent: Node = null, worldPositionStays: boolean = true, position: Vector3 = null, rotation: Quaternion = null): Sprite3D {
        var destSprite3D: Sprite3D = (<Sprite3D>original.clone());
        (parent) && (parent.addChild(destSprite3D));
        var transform: Transform3D = destSprite3D.transform;
        if (worldPositionStays) {
            var worldMatrix: Matrix4x4 = transform.worldMatrix;
            original.transform.worldMatrix.cloneTo(worldMatrix);
            transform.worldMatrix = worldMatrix;
        } else {
            (position) && (transform.position = position);
            (rotation) && (transform.rotation = rotation);
        }
        return destSprite3D;
    }
original :原始精灵。
parent:父节点。
worldPositionStays:是否保持自身世界变换。
position:世界位置,worldPositionStays为false时生效。
rotation:世界旋转,worldPositionStays为false时生效。
该方法可以在克隆时携带父节点信息,世界位置信息和世界旋转信息。
(动图4-2)
通过代码来instantiate克隆一个猴子
//sprite3d的instantiate克隆方法
let layaMonkey_clone1 = Laya.Sprite3D.instantiate(this.layaMonkeyParent, this.scene, false, new Laya.Vector3(-2, 0, 0), new Laya.Quaternion(0, -90, 0));
this.scene.addChild(layaMonkey_clone1);
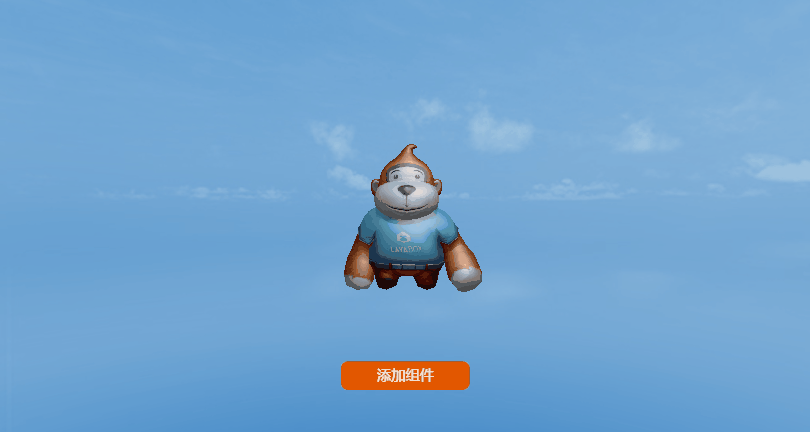
五、添加组件
LayaAir中,可以对任何3D对象添加Component 组件,如动图5-1所示
(动图5-1)
Component 组件,是附加到所有3D对象的内容的基类。
通过代码也可以添加组件,需要物体使用addComponent方法
//添加Rigidbody3D组件
let rigidBody = this.layaMonkeyParent.addComponent(Laya.Rigidbody3D) as Laya.Rigidbody3D;
//创建盒子形状碰撞器
var boxShape = new Laya.BoxColliderShape(1, 1, 1);
//设置盒子的碰撞形状
rigidBody.colliderShape = boxShape;
//使用重力
rigidBody.overrideGravity = true;
//重力为向下-10
rigidBody.gravity = new Laya.Vector3(0,-10,0);
(动图5-2)
如动图5-2,添加 Rigidbody3D 组件,并且设置重力的效果(需要在“项目设置”中勾选物理相关的“引擎模块”)。
六、添加脚本
在3D世界的开发中,脚本类会在很多地方被使用,给Sprite3D添加一个脚本。如动图6-1所示。
(动图6-1)
我们可以给Main Camera添加一个通过鼠标和键盘来控制摄像机的脚本,这个脚本在实际开发过程中非常的实用,图6-2中,显示摄像机添加了这个脚本。
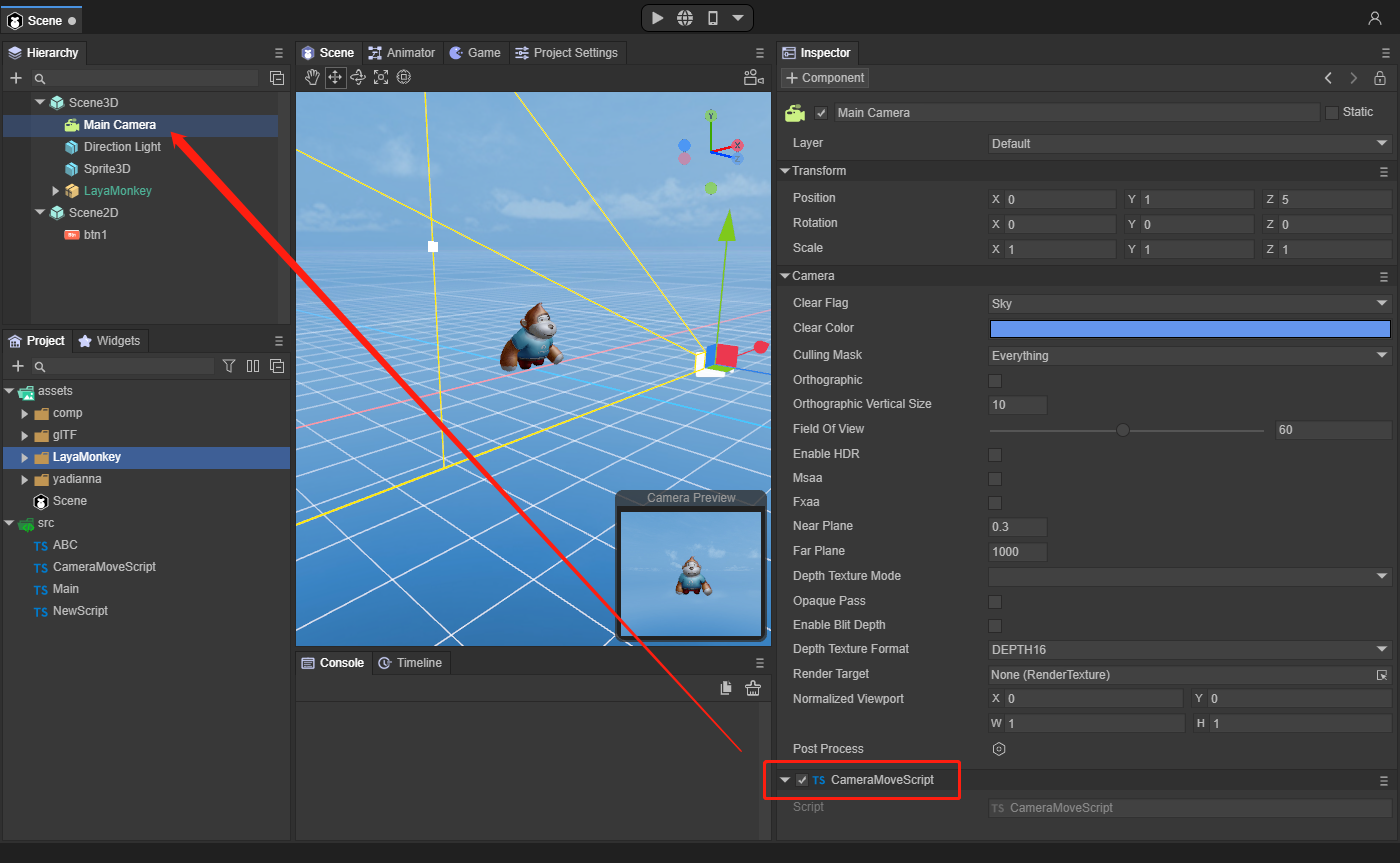
(图6-2)
脚本的代码为:
const { regClass, property } = Laya;

@regClass()
export class CameraMoveScript extends Laya.Script3D {

    /** @private */
    protected _tempVector3: Laya.Vector3 = new Laya.Vector3();
    protected lastMouseX: number = 0;
    protected lastMouseY: number = 0;
    protected yawPitchRoll: Laya.Vector3 = new Laya.Vector3();
    protected resultRotation: Laya.Quaternion = new Laya.Quaternion();
    protected tempRotationZ: Laya.Quaternion = new Laya.Quaternion();
    protected tempRotationX: Laya.Quaternion = new Laya.Quaternion();
    protected tempRotationY: Laya.Quaternion = new Laya.Quaternion();
    protected isMouseDown: boolean = false;
    protected rotaionSpeed: number = 0.00006;
    protected camera: Laya.BaseCamera = new Laya.Camera;
    protected scene: Laya.Scene3D = new Laya.Scene3D;

    speed: number = 0.01;

    constructor() {
        super();
    }

    /**
     * @private
     */
    protected _updateRotation(): void {
        if (Math.abs(this.yawPitchRoll.y) < 1.50) {
            Laya.Quaternion.createFromYawPitchRoll(this.yawPitchRoll.x, this.yawPitchRoll.y, this.yawPitchRoll.z, this.tempRotationZ);
            this.tempRotationZ.cloneTo(this.camera.transform.localRotation);
            this.camera.transform.localRotation = this.camera.transform.localRotation;
        }
    }

    /**
     * 监听鼠标事件
     */
    onAwake(): void {
        Laya.stage.on(Laya.Event.MOUSE_DOWN, this, this.mouseDown);
        Laya.stage.on(Laya.Event.MOUSE_UP, this, this.mouseUp);
        this.camera = (<Laya.Camera>this.owner);
    }

    /**
     * 监听键盘事件
     */
    onUpdate(): void {
        var elapsedTime: number = Laya.timer.delta;
        if (!isNaN(this.lastMouseX) && !isNaN(this.lastMouseY) && this.isMouseDown) {
            Laya.InputManager.hasKeyDown(87) && this.moveForward(-this.speed * elapsedTime);//W
            Laya.InputManager.hasKeyDown(83) && this.moveForward(this.speed * elapsedTime);//S
            Laya.InputManager.hasKeyDown(65) && this.moveRight(-this.speed * elapsedTime);//A
            Laya.InputManager.hasKeyDown(68) && this.moveRight(this.speed * elapsedTime);//D
            Laya.InputManager.hasKeyDown(81) && this.moveVertical(this.speed * elapsedTime);//Q
            Laya.InputManager.hasKeyDown(69) && this.moveVertical(-this.speed * elapsedTime);//E

            var offsetX: number = Laya.stage.mouseX - this.lastMouseX;
            var offsetY: number = Laya.stage.mouseY - this.lastMouseY;

            var yprElem: Laya.Vector3 = this.yawPitchRoll;
            yprElem.x -= offsetX * this.rotaionSpeed * elapsedTime;
            yprElem.y -= offsetY * this.rotaionSpeed * elapsedTime;
            this._updateRotation();
        }
        this.lastMouseX = Laya.stage.mouseX;
        this.lastMouseY = Laya.stage.mouseY;
    }

    /**
     * 释放监听
     */
    onDestroy(): void {
        Laya.stage.off(Laya.Event.MOUSE_DOWN, this, this.mouseDown);
        Laya.stage.off(Laya.Event.MOUSE_UP, this, this.mouseUp);
    }

    protected mouseDown(e: Laya.Event): void {
        this.camera.transform.localRotation.getYawPitchRoll(this.yawPitchRoll);
        this.lastMouseX = Laya.stage.mouseX;
        this.lastMouseY = Laya.stage.mouseY;
        this.isMouseDown = true;
    }

    protected mouseUp(e: Laya.Event): void {
        this.isMouseDown = false;
    }

    protected mouseOut(e: Laya.Event): void {
        this.isMouseDown = false;
    }

    /**
     * 向前移动。
     * @param distance 移动距离。
     */
    moveForward(distance: number): void {
        this._tempVector3.x = this._tempVector3.y = 0;
        this._tempVector3.z = distance;
        this.camera.transform.translate(this._tempVector3);
    }

    /**
     * 向右移动。
     * @param distance 移动距离。
     */
    moveRight(distance: number): void {
        this._tempVector3.y = this._tempVector3.z = 0;
        this._tempVector3.x = distance;
        this.camera.transform.translate(this._tempVector3);
    }

    /**
     * 向上移动。
     * @param distance 移动距离。
     */
    moveVertical(distance: number): void {
        this._tempVector3.x = this._tempVector3.z = 0;
        this._tempVector3.y = distance;
        this.camera.transform.translate(this._tempVector3, false);
    }

}
运行时效果如动图6-3所示
(动图6-3)
七、各种渲染精灵简介
这里的渲染精灵都是通过组件实现
7.1 Mesh精灵
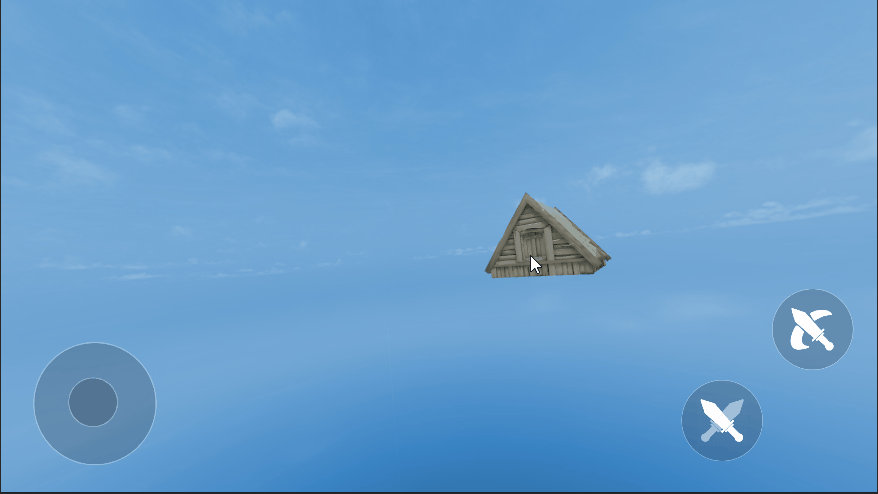
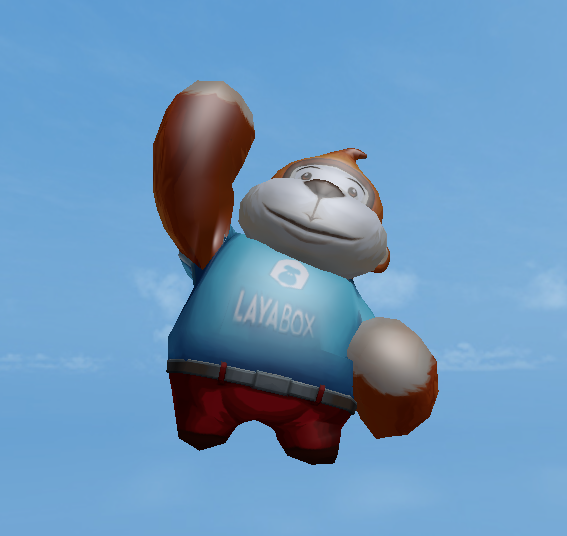
Mesh精灵是引擎中最常用的 静态网格精灵,可根据于美术软件预制作或自定义的网格数据渲染模型。例如图7-1场景中的各种建筑模型、山体岩石一般均为Mesh精灵。
(图7-1)
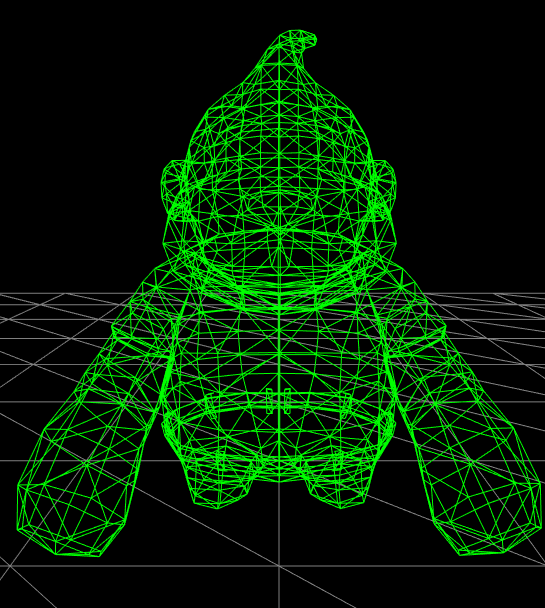
通常我们在实践中会创建简单的Mesh网格3D对象,如图7-2所示
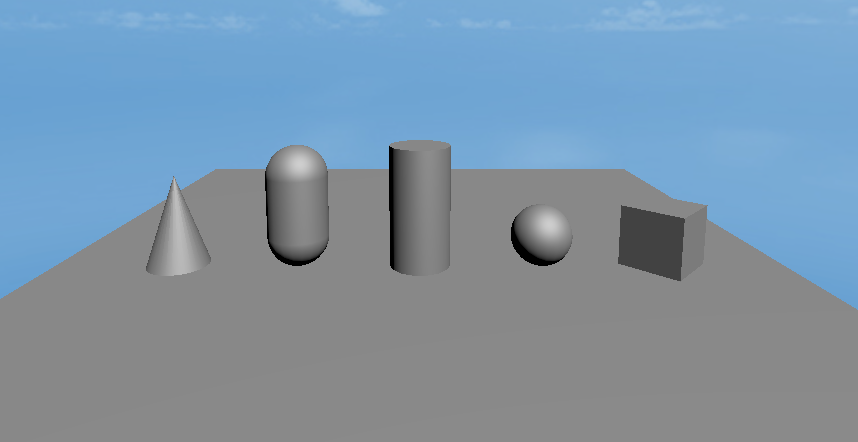
(图7-2)
7.2 SkinnedMesh精灵
SkinnedMesh精灵是引擎中的 蒙皮动画网格精灵,可根据美术软件预制作的网格数据和Animator组件的动画数据产生动作形变。常用于带蒙皮动画的角色、怪物等。和Mesh精灵相比具产生网格形变的能力。
(图7-3)
7.3 Particle3D 精灵
Particle3D 是引擎中的 3D粒子精灵,可根据美术人员编辑的粒子参数产生奇妙炫酷的粒子特效。一般用于各种角色技能特效或火焰、烟雾等场景特效。
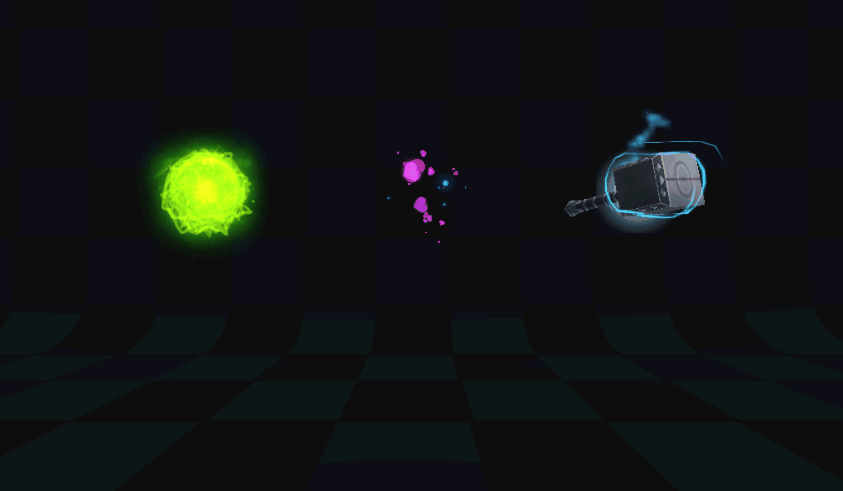
(动图7-4)
7.4 PixelLine 精灵
PixelLine 是引擎中的 像素线精灵,可根据脚本的绘制数据产生任意颜色的像素线。一般用于场景中的引导效果或项目调试数据用途。
(图7-5)
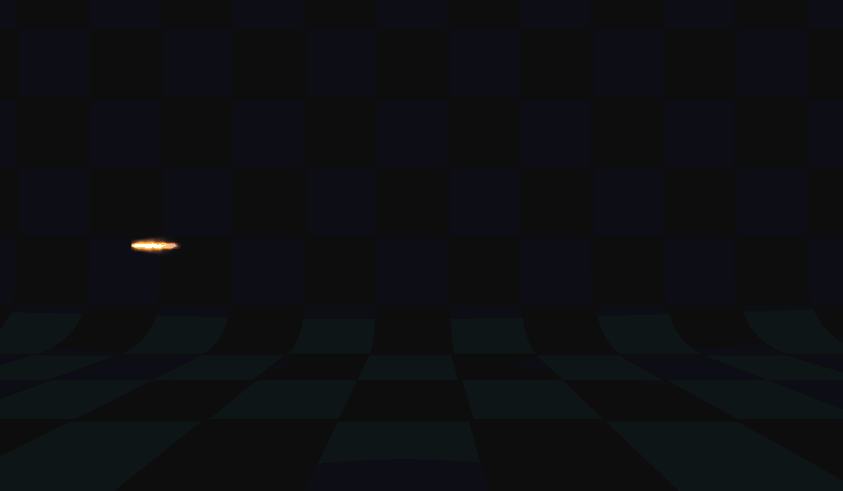
7.5 Trail 精灵
Trail 是引擎中的 拖尾精灵,可根据精灵运动轨迹产生动态的拖尾特效。一般用于各种轨迹拖尾效果的展示。
(动图7-6)